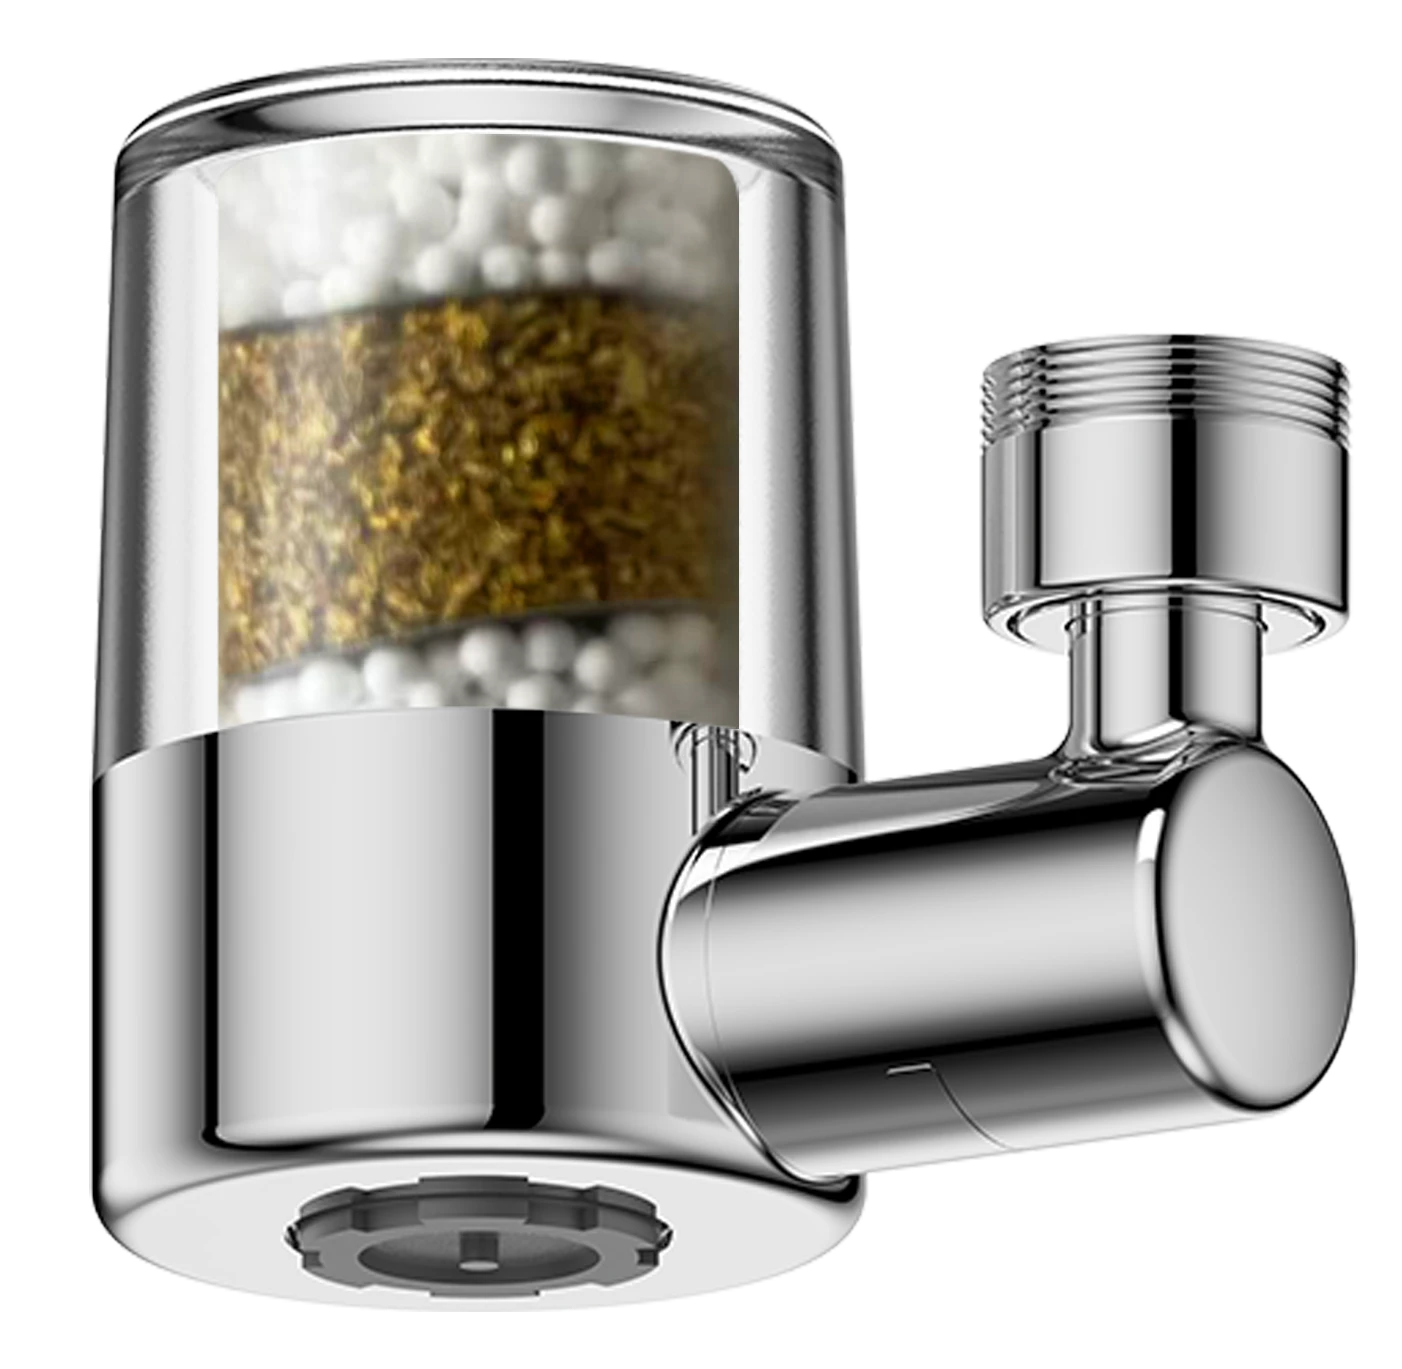
Compact 720° swivel adjustment for directing the outlet around your sink. Rotate the aerator to choose an aerated stream or spray. The replaceable FF20C core brings filtration to everyday sink tasks.
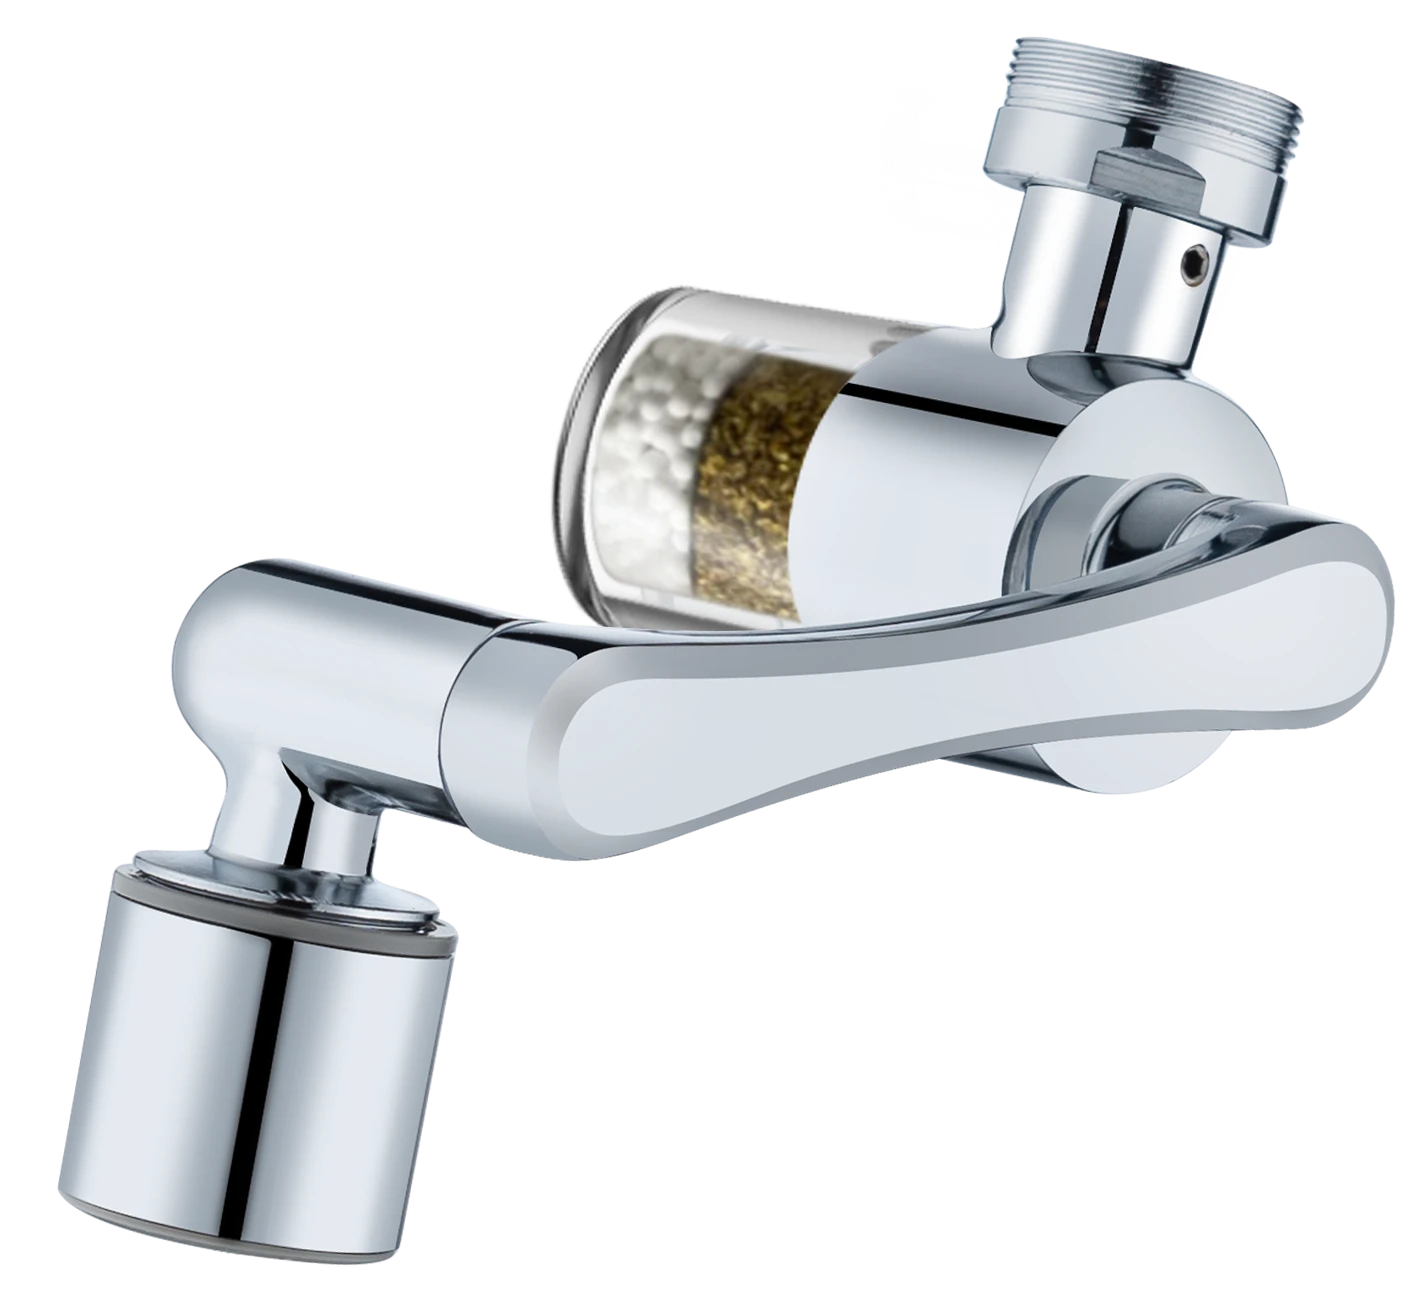
Three adjustable joints, each rotating 360°, give you 1080° combined adjustment and more reach around the sink. Rotate the aerator to choose an aerated stream or spray. The replaceable FF20C core brings filtration to everyday sink tasks.
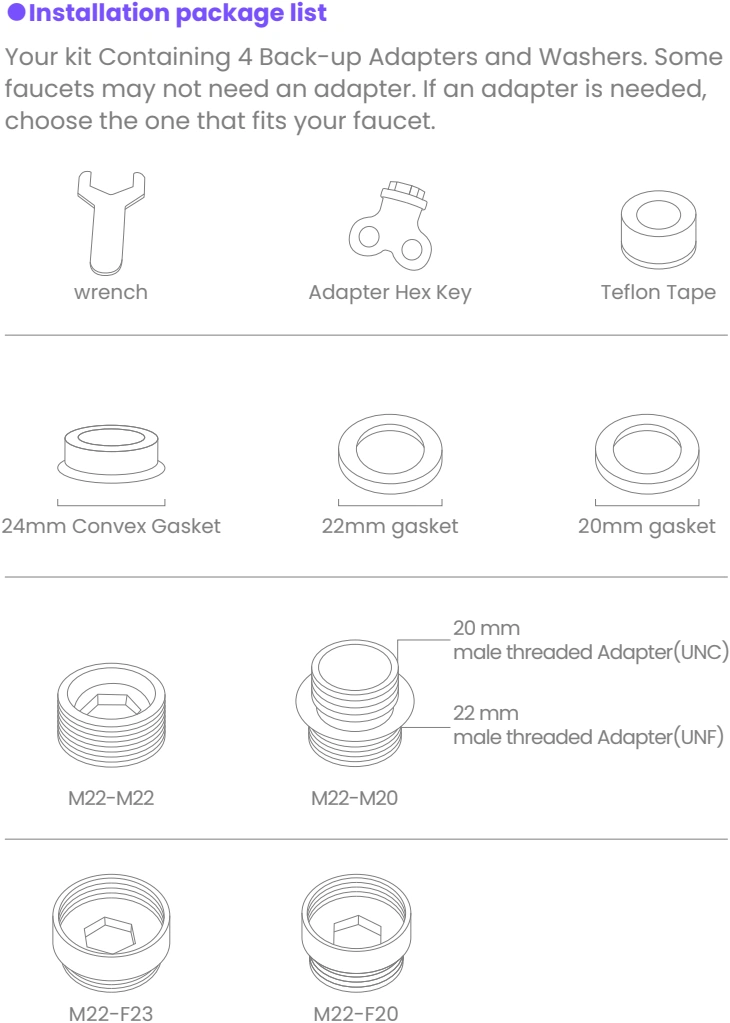
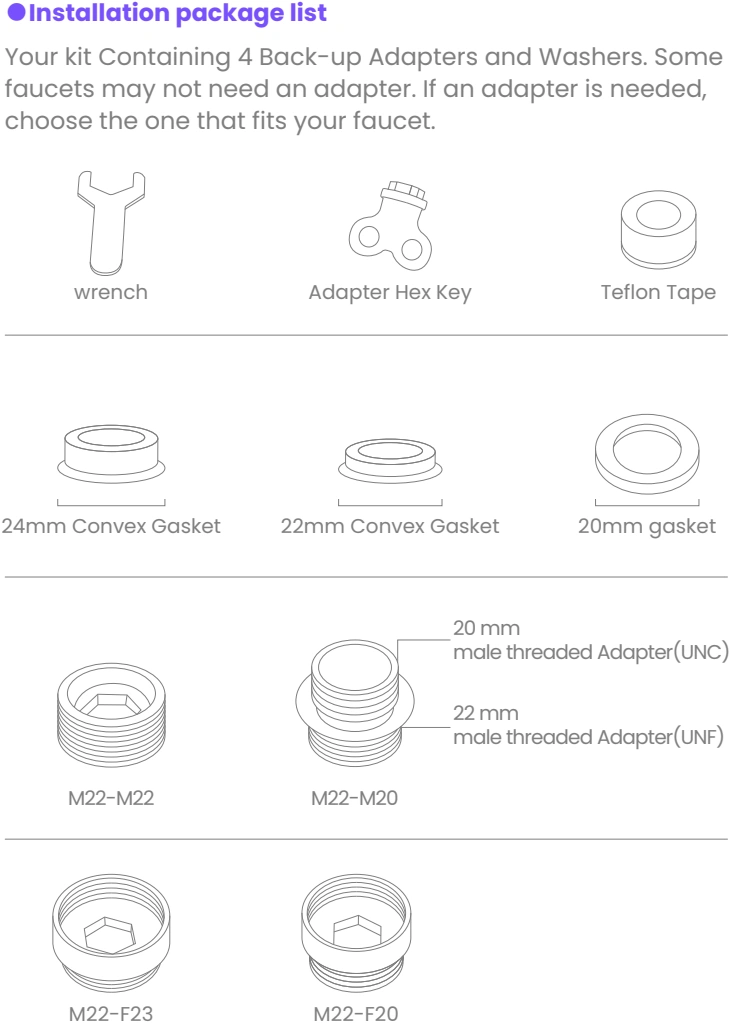
Installation wrench, adapter hex key, sealing tape, four adapters (M22–M22, M22–M20, M22–F23 and M22–F20), and the supplied 24 mm, 22 mm and 20 mm washers. Some faucets fit directly without an adapter.
Match the faucet thread
A faucet with female threads needs the matching male-threaded adapter. A faucet with male threads needs the matching female-threaded adapter. Check the thread and washer before tightening. If the supplied adapters do not fit, contact support with the faucet measurements and a clear photo.
FF201 supplied adapters, tools and washers
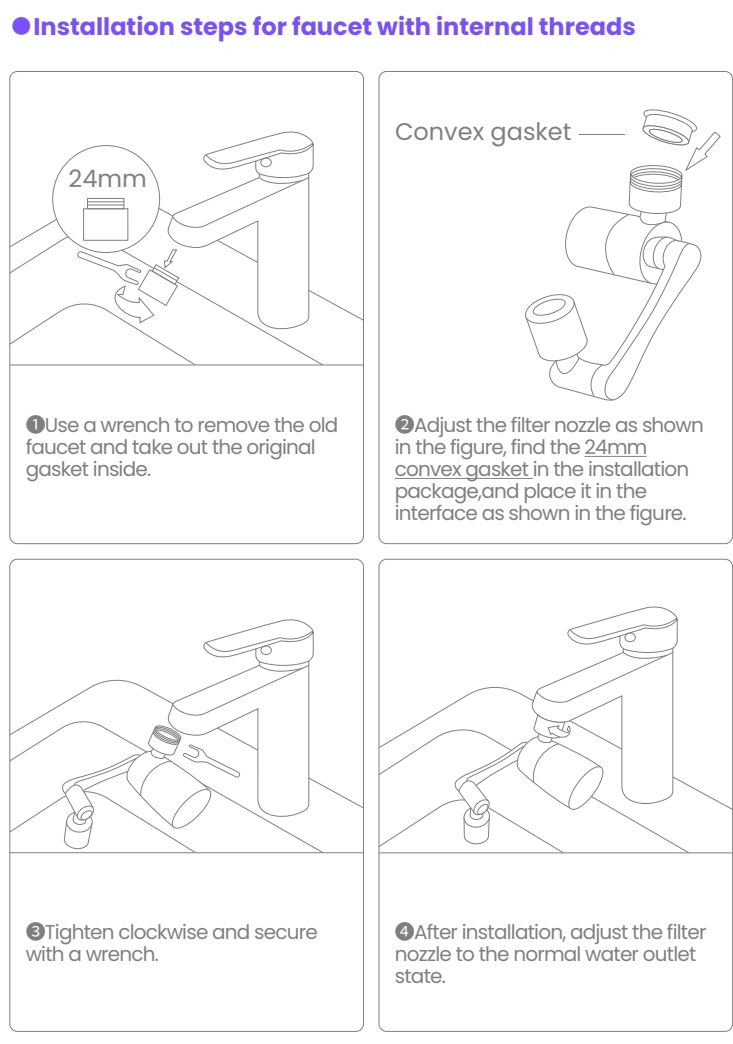
Internal-thread faucet
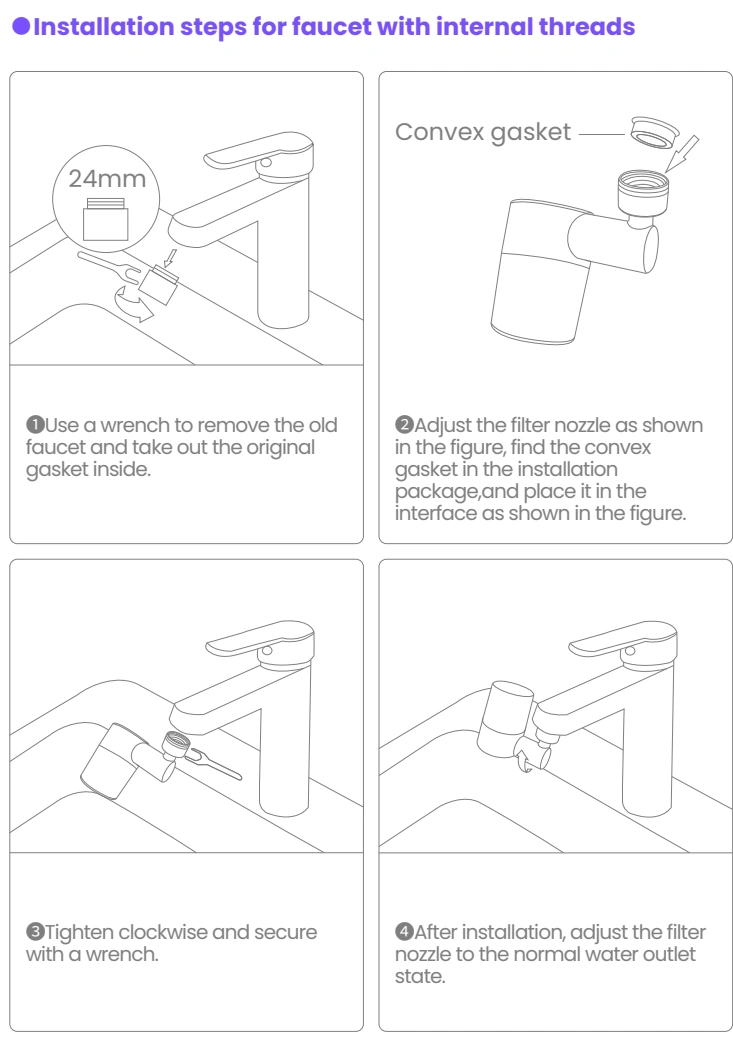
Turn off the water. Remove the old aerator and its original washer.
Place the supplied 24 mm convex washer in the filter connection as illustrated.
Fit clockwise and secure with the installation wrench.
Adjust the filter nozzle to its normal outlet position, then check for leaks.
FF201 installation on a faucet with internal threads
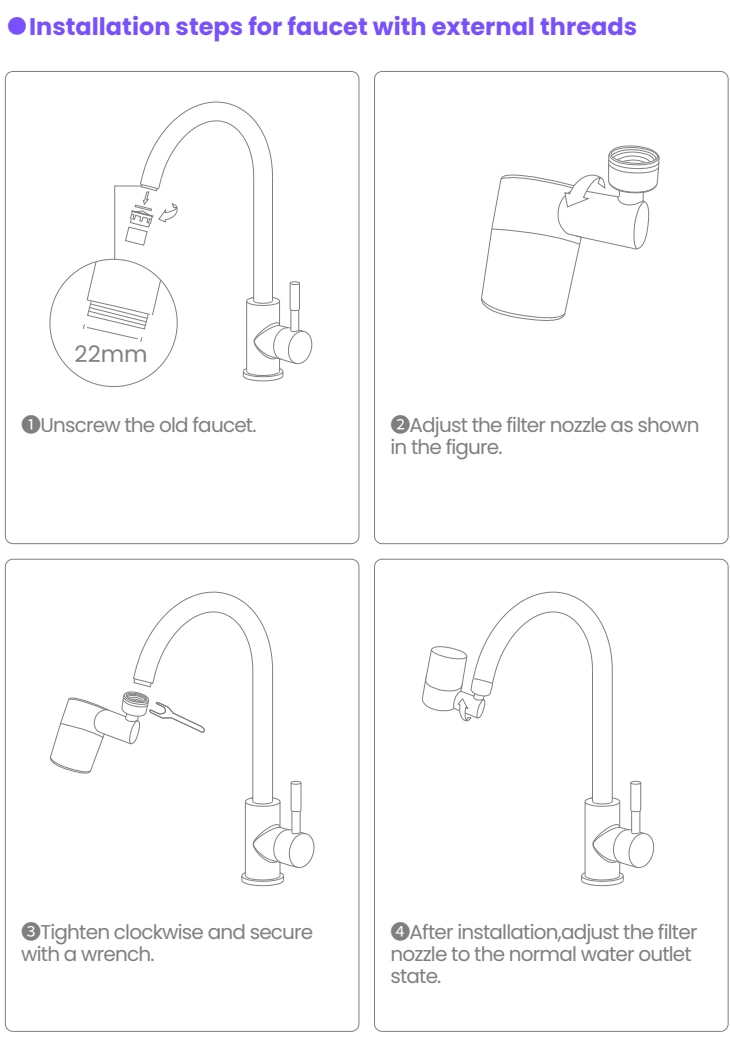
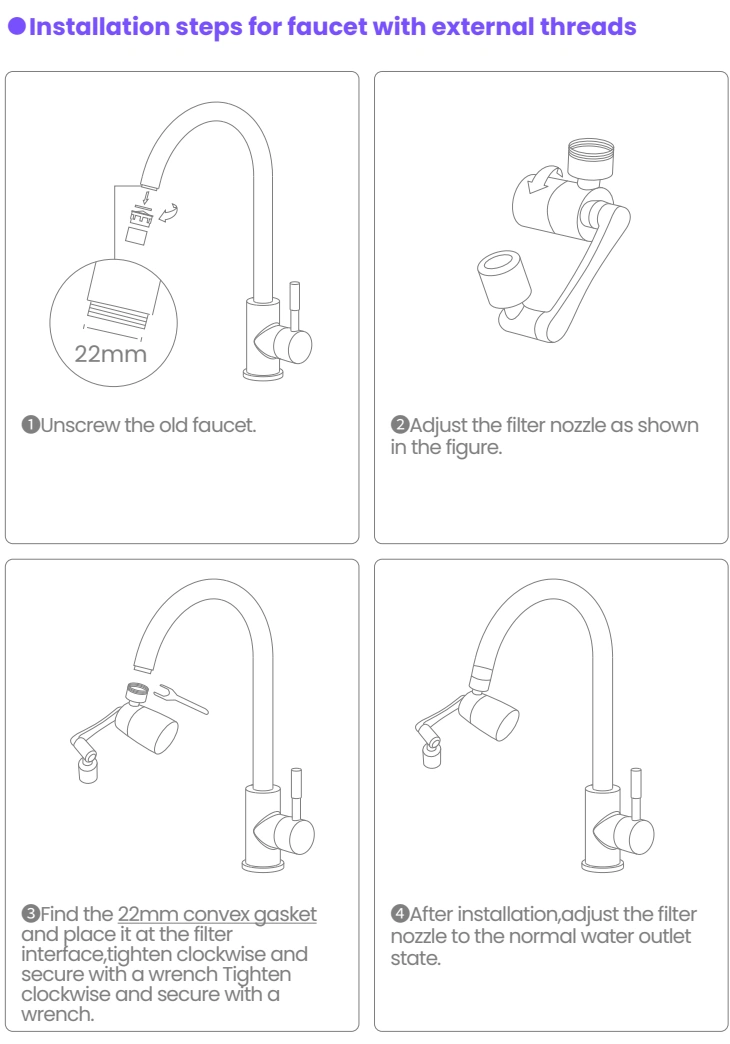
External-thread faucet
Turn off the water and remove the old aerator.
Adjust the filter connection as shown. Select the matching adapter and washer.
Tighten clockwise and secure with the wrench.
Return the nozzle to the normal outlet position and check for leaks.
FF201 installation on a faucet with external threads
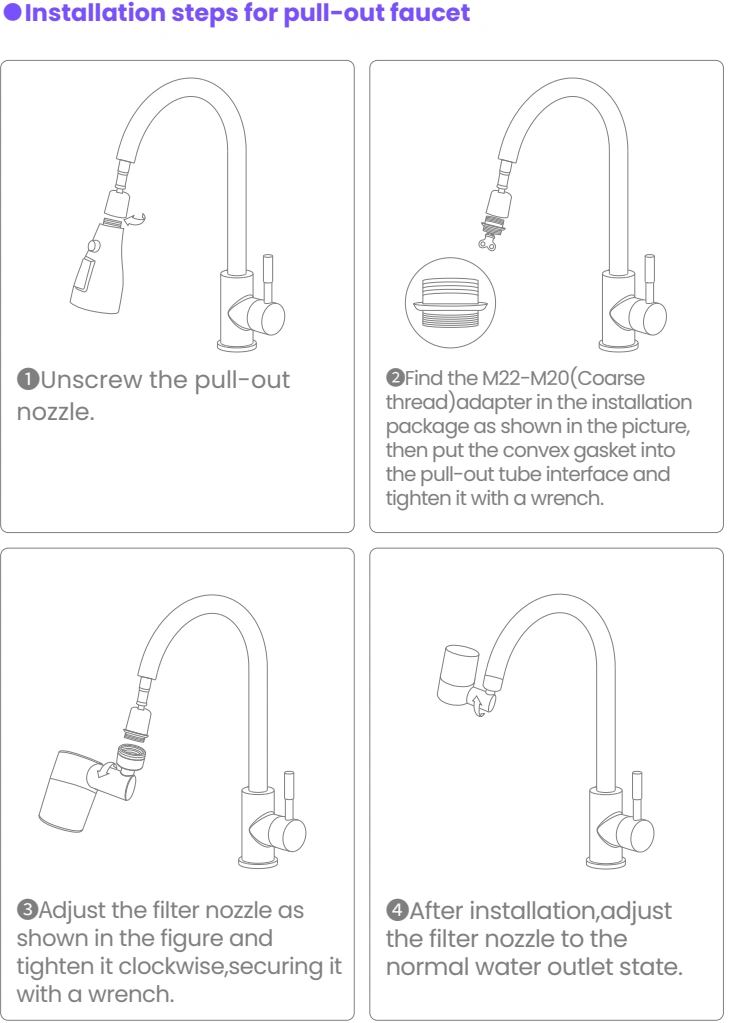
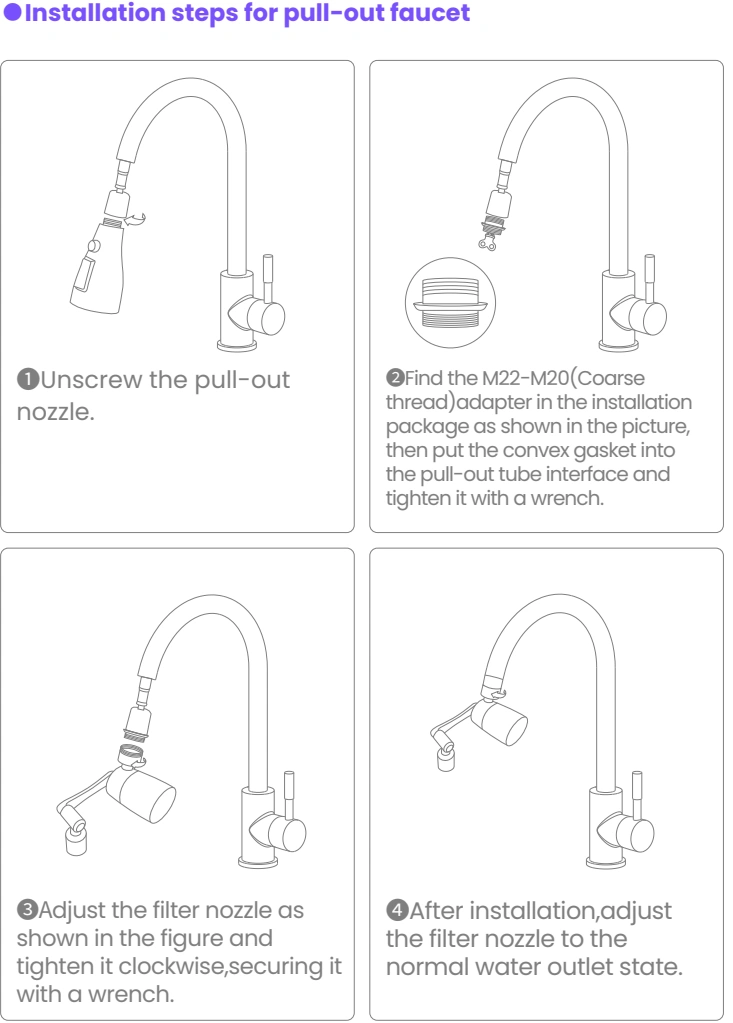
Pull-out faucet installation
Turn off the water and unscrew the pull-out nozzle.
Select the M22–M20 coarse-thread adapter, insert the convex washer at the pull-out connection and tighten using the wrench.
Adjust and fit the filter nozzle as shown, tightening clockwise.
Restore the normal water outlet position and check the completed connections.
FF201 pull-out faucet installation sequence
Two water modes
Rotate the aerator to switch between the two water modes.
Care
Avoid prolonged exposure to hot water. Adjust the outlet to a comfortable temperature before washing.
FF201 / FF20C
How to replace your cartridge.
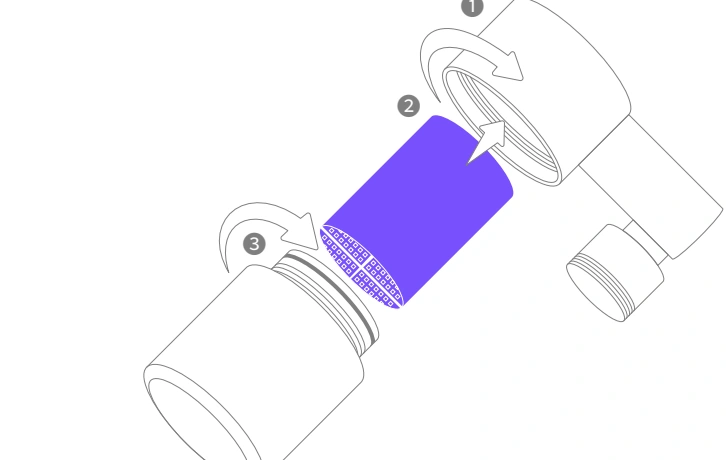
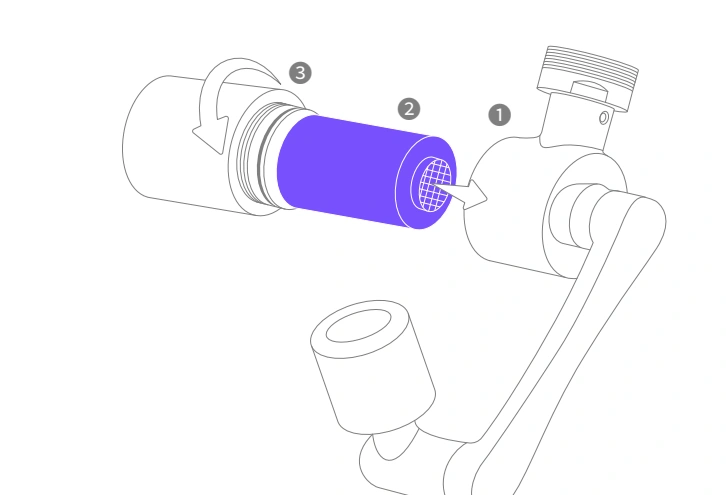
FF201 cartridge replacement — original instruction illustration
Turn off the water. Unscrew the filter cover and remove the used FF20C cartridge.
Insert a new FF20C cartridge in the correct direction shown in the illustration.
Screw the cover back on tightly and check for leaks.
Flush before use
After reassembly, run warm water at 40–60°C (104–140°F) through the filter for one minute to activate and flush the new cartridge. Adjust the water to a comfortable temperature before use.
Replace the cartridge every 3–4 months or after 6,000 US gallons (approx. 22,700 L), whichever comes first. Water quality and use may require earlier replacement.
Use & care
FF202 Installation guide.
Included installation tools and fittings
Installation wrench, adapter hex key, sealing tape, four adapters (M22–M22, M22–M20, M22–F23 and M22–F20), and the supplied 24 mm, 22 mm and 20 mm washers. Some faucets fit directly without an adapter.
Match the faucet thread
A faucet with female threads needs the matching male-threaded adapter. A faucet with male threads needs the matching female-threaded adapter. Check the thread and washer before tightening. If the supplied adapters do not fit, contact support with the faucet measurements and a clear photo.
FF202 supplied adapters, tools and washers
Internal-thread faucet
Turn off the water. Remove the old aerator and its original washer.
Place the supplied 24 mm convex washer in the filter connection as illustrated.
Fit clockwise and secure with the installation wrench.
Adjust the filter nozzle to its normal outlet position, then check for leaks.
FF202 installation on a faucet with internal threads
External-thread faucet
Turn off the water and remove the old aerator.
Adjust the filter connection as shown. Select the matching adapter and washer. For FF202, place the supplied 22 mm convex washer at the connection.
Tighten clockwise and secure with the wrench.
Return the nozzle to the normal outlet position and check for leaks.
FF202 installation on a faucet with external threads
Pull-out faucet installation
Turn off the water and unscrew the pull-out nozzle.
Select the M22–M20 coarse-thread adapter, insert the convex washer at the pull-out connection and tighten using the wrench.
Adjust and fit the filter nozzle as shown, tightening clockwise.
Restore the normal water outlet position and check the completed connections.
FF202 pull-out faucet installation sequence
Two water modes
Rotate the aerator to switch between the two water modes.
Care
Avoid prolonged exposure to hot water. Adjust the outlet to a comfortable temperature before washing.
FF202 / FF20C
How to replace your cartridge.
FF202 cartridge replacement — original instruction illustration
Turn off the water. Unscrew the filter cover and remove the used FF20C cartridge.
Insert a new FF20C cartridge in the correct direction shown in the illustration.
Screw the cover back on tightly and check for leaks.
Flush before use
After reassembly, run warm water at 40–60°C (104–140°F) through the filter for one minute to activate and flush the new cartridge. Adjust the water to a comfortable temperature before use.
Replace the cartridge every 3–4 months or after 6,000 US gallons (approx. 22,700 L), whichever comes first. Water quality and use may require earlier replacement.